Before and during the recording, you can view your live camera images in the Preview window, as shown in the here:

The number of Camera view and available options depends on your equipment and the configuration of the selected Scenario.
Preview Toolbar
The toolbar of the Preview window holds the following commands, if you are logged in as a LabManager. Regular users so not see all icons:

|
Home - To return to the home screen of VideoSyncPro Studio |
|
Start record - Click this button to start the actual recording |
|
Stop record - Only visible during a recording. Click this button to end a recording |
|
Session name - Name used as part of the recording folder of this session |
|
Session description - Enter a free text description for the current recording |
|
Scenario Properties - Dialog to predefine scenario specific options |
|
Time - Showing the elapsed time of the current recording |
|
Layout - Menu with possible camera layouts, depending on the number of cameras in the current scenario |
|
Menu - Hamburger menu with additional available functionalities, its content depends on the currently logged-in user |
|
Save - To save changes in the current scenario or Markers and Events |
|
Security - Switch between users to gain more rights |
|
Settings - Application settings dialog, per default only accessible for the Lab Manager and Administrator |
|
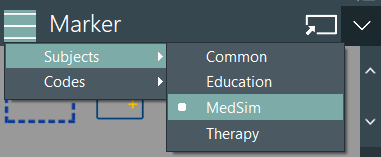
Action Scripts - Menu showing predefined scripts, if available. |
|
Help - Access to both online and local documentation and verify the software version under About. |
Preview Layout
The preview panels of your video sources are arranged automatically. Depending on the number of camera sources, the Layout menu (6) offers different arrangements for your preview panels.
▪Read Panel and Window Handling for further information.
Dashboard Panels
At the right side of the application window VideoSyncPro Studio offers various dashboard panels with different settings and selection possibilities. What panels are available depends on your license, devices available in the network, components of your setup, and the currently active scenario.
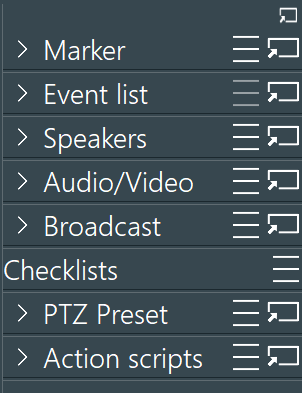
Available Dashboard Panels
Depending on your license, one or more of these panels may be visible in your setup: Expand Dashboard panel Each panel can be expanded to reveal its contents. ▪Click the Expand triangle to see the available components per panel. |
Undock Dashboard Panels
Each dashboard panel can be un-docked and relocated if you find that more convenient:
▪Click on this ![]() Float icon to turn a panel into a floating window.
Float icon to turn a panel into a floating window.

Floating panels are no longer listed in the side bar dashboard .
▪Close a floating panel by clicking the Dock icon and the panel is automatically repositioned in the sidebar.
TIPP: It is also possible to undock the side-bar as a whole, by clicking the tiny ![]() Float icon in the upper right corner of the Dashboard panel.
Float icon in the upper right corner of the Dashboard panel.
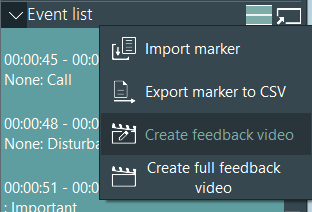
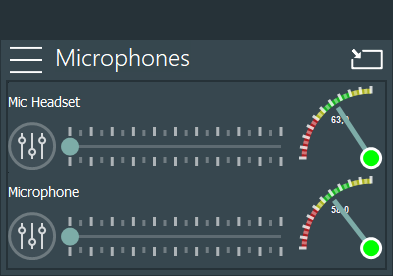
Dashboard Panel Menu
Each dashboard panel has a panel specific menu icon in its upper left corner.
Most of the panels do offer specific commands in this menu: