The automated speaker detection assigns speaker labels like SPEAKER_00, SPEAKER_01, depending on the order of 'appearance' in the audio track.
This means that in different videos with the same participants, the speaker label can differ per participant across transcriptions.
To properly compare the participants over multiple sessions, you need to rename the automated labels per transcription to properly identify the participant across recordings.
You can do this manually, with help of the Replace command, or you can prepare a Workflow that you can easily adapt.
Create Renaming Workflow
General details about creating workflows can be found in the chapter Workflow Editor.
The instructions here are limited to the required steps.
▪Select Start - Advanced - Workflows ![]() > Workflow Editor
> Workflow Editor
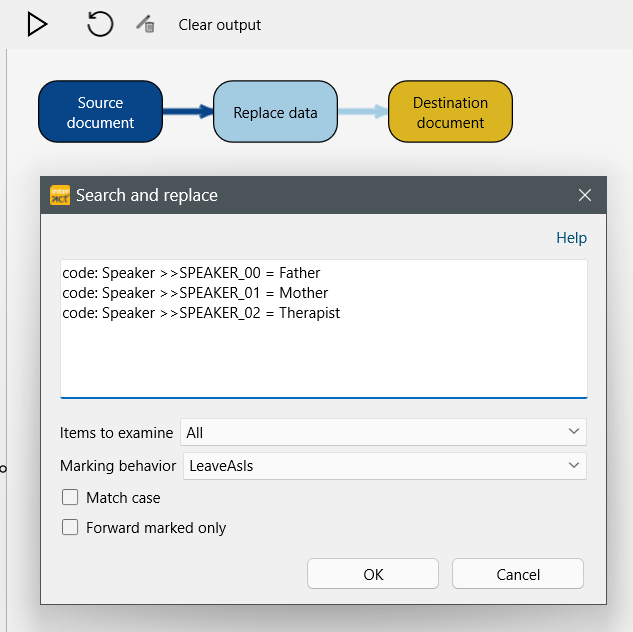
▪Add the modules Source document, Destination document, and Replace data to the workflow editor.
▪Re-arrange and connect the modules in their required order:
▪Configure the Replace data module like shown in the picture, and enter your speaker labels after the = sign.
code: Speaker >>SPEAKER_00 = Father
code: Speaker >>SPEAKER_01 = Mother
code: Speaker >>SPEAKER_02 = Therapist
IMPORTANT: Per transcription, you must verify the automatically assigned speaker labels to identify the correct match!
To test your configuration, click the triangle just above the modules to run your custom command combination.
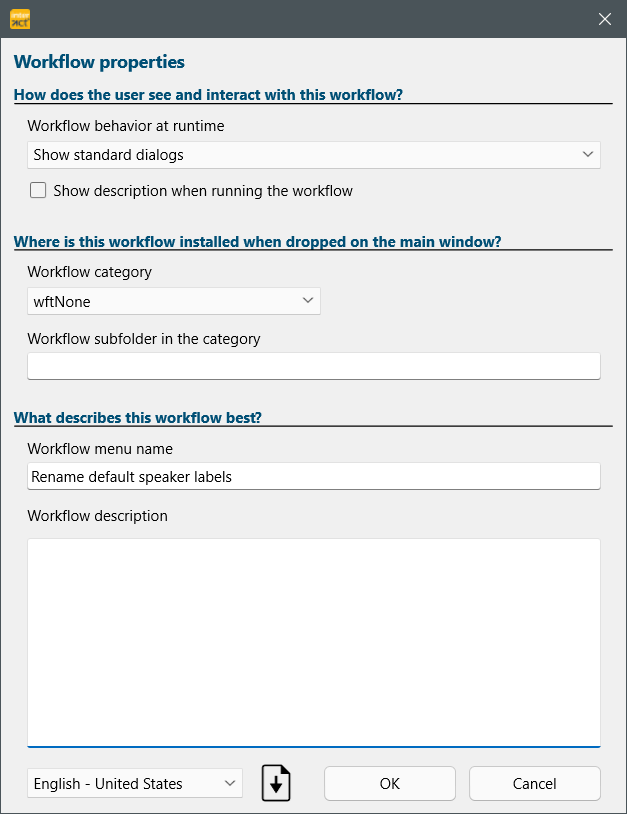
▪Right-Click on an empty spot in the Worflow-Editor's canvas and select Workflow properties:

▪Enter a proper name for your custom command under which it will appear in the Workflow menu.
▪Confirm with OK.
▪Save your workflow with a proper name.
▪Drag the workflow file on the main INTERACT window to install the workflow.
Note: For every execution, the user must know the proper speaker labels and edit them if necessary.
