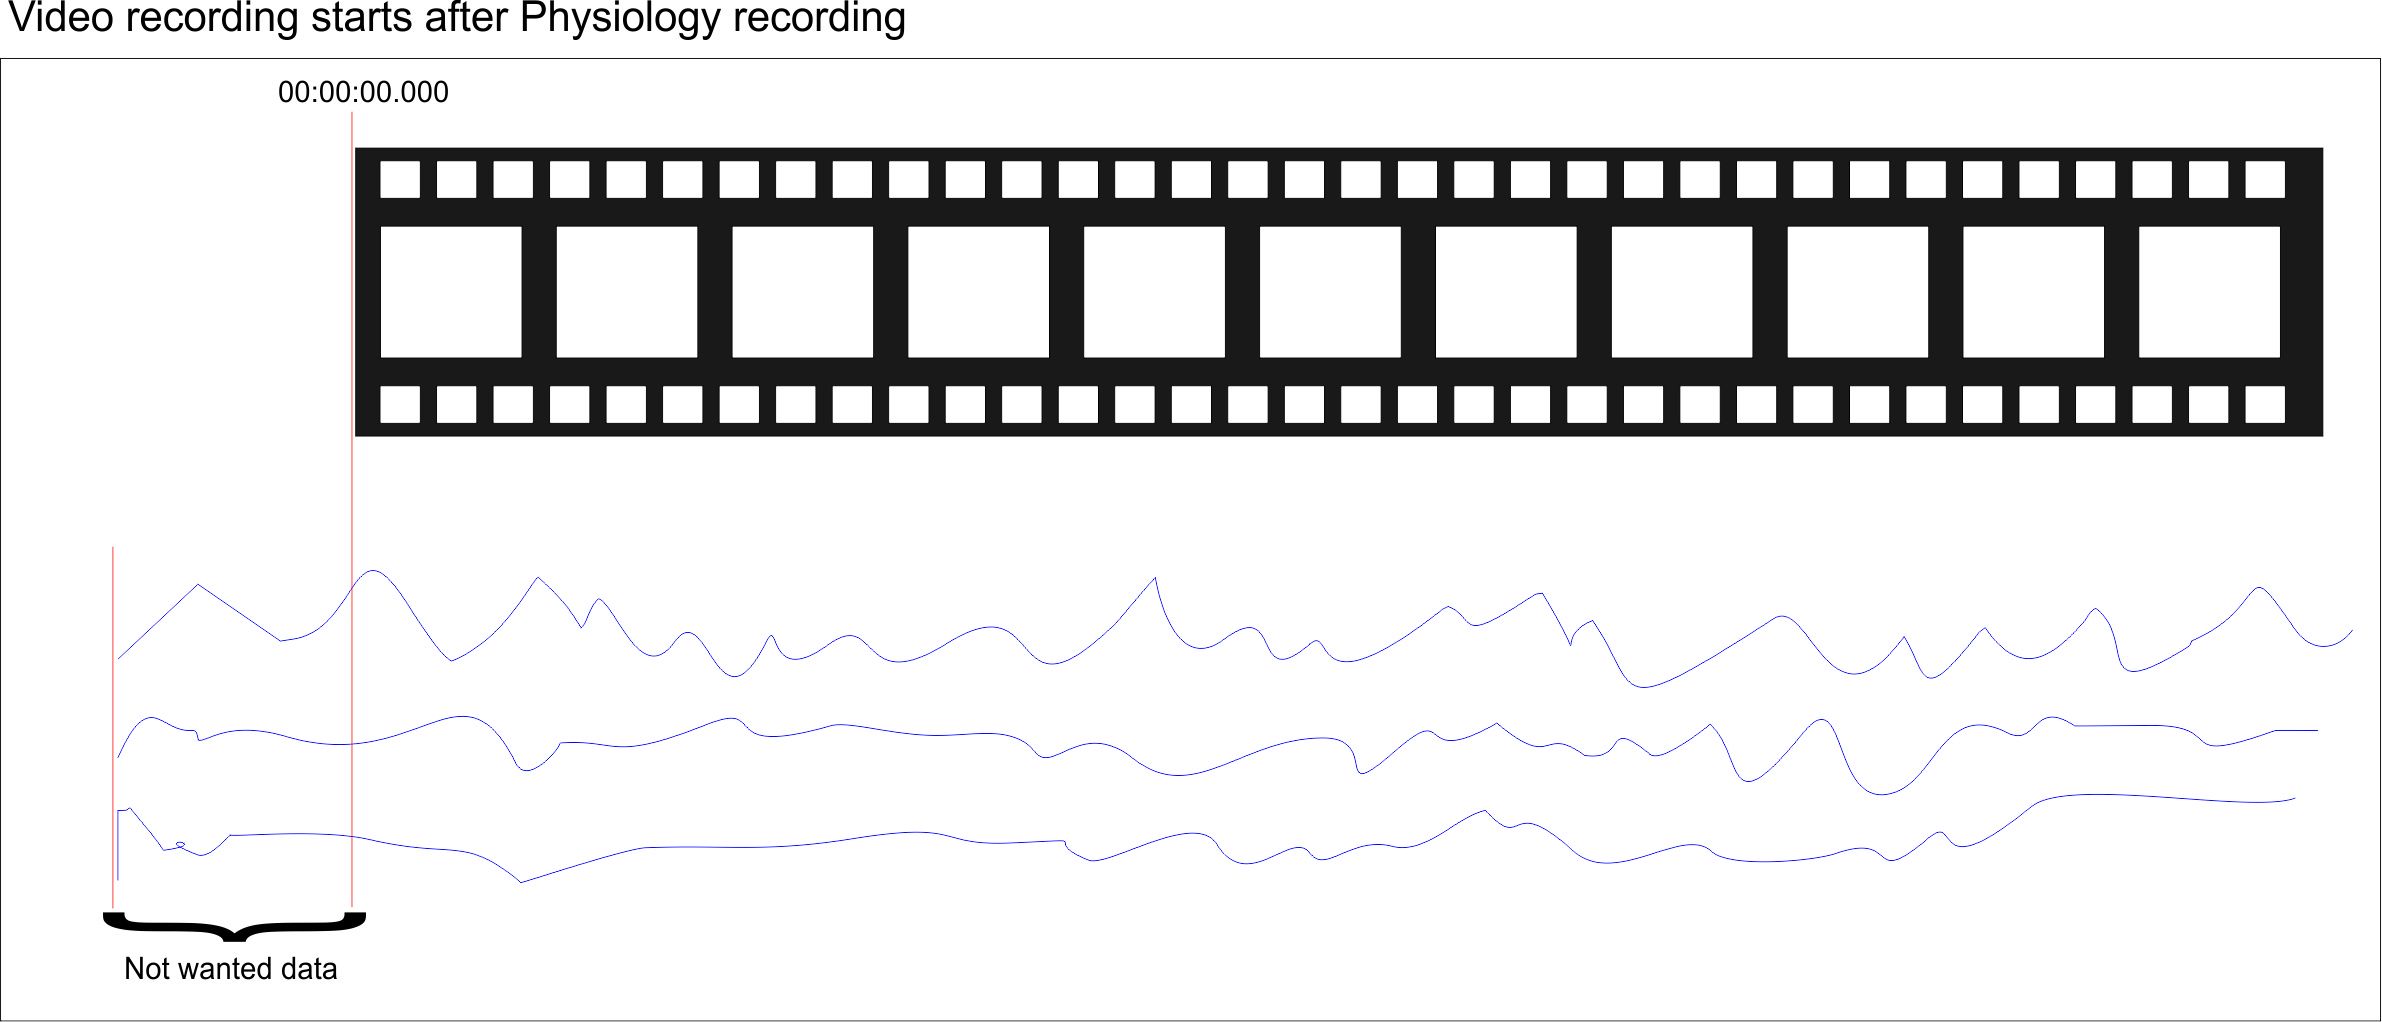
If the video recording started AFTER the start of the sensor data recording, we have the following situation:

Importing this kind of data can be handled in two different ways:
Specify Offset within DataView - You can import the complete sensor data and either search for the peak in your data that corresponds with the start of your video recording or enter the time value (in milliseconds) that you know matches the start of the video recording as an offset in the Layout settings.
Insert a marker - If you can identify the data line that matches the start of the video recording, you can enter a marker manually. If the sensor data recording started way before the video recording, this approach is recommended, to reduce the file size of your DataView file after import.
Specify Offset
If your sensor data file is not too big or if you do not know exactly what value to look for, but you can recognize it as a peak in a chart, use DataView to locate your sync line and to specify the required offset.
▪Import your sensor data es described in the section Import Sensor Data, using the First line shall be zero option for easier adjustments.
▪Visualize your data within DataView.
▪Search for the line or the peak you consider to be your synchronization point.
▪Enter the millisecond time value of that line into the Offset field of the current layout, as is described in the Layout Settings:
CTRL + RIGHT CLICK into the chart at the required position and pick Set current X value as start offset.

Note: This offset information is stored within the currently active layout.
If you picked the right peak, your sensor data is now played in sync with the video.
Insert Marker
You need to be able identify the exact line in your sensor data export, that matches either the start of your video or any other recognizable activity in the video. If your sensor data software does not allow you to do this, during recording or afterward, you need to use a text editor or ms Excel to do this.
For large data files, holding many high frequency data lines, your text editor or ms Excel probably reach their file limit before the end of your data file. In that case, consider exporting a data file with a lower frequency, to limit the number of values per video frame, or use the Specify Offset routine available in DataView, as described just before.
Again there is a different approach for data with and without time information.
Data with time information
For this type of data, an additional marker is not required, because one of the time stamps can be used.
▪Open your data file in its original software, a text editor, MS Excel.
▪Identify the data line you can use for synchronization.
▪Remember the exact time stamp notation, available in that data line, and the column name or number in which this value can be found.
Data without time information
If no time information is available, you will need to enter a unique marker manually. If your software does not allow you to enter a marker, either during or after the recording session, you need a unique value to label your data line. This can be a 'lost sensor' value, you created by unplugging a sensor, or a manually entered value.
Locate Marker in Notepad
If you are looking for the exact notation of your special 'marker' value, or want to enter your value into one of the existing columns, a text editor is the fastest way, if your data file isn't too big:
▪Open your data file in a text editor (Notepad, Notepad++, etc.)
▪Locate the line or value you are looking for.
▪Enter your marker into that line, if there is no unique value you can use.
▪Remember the exact notation and the corresponding column name of your marker value.
▪If you made any changes, save the data file.
Set Marker in MS Excel
To enter your Marker into a new column, Excel is probably the easiest way:
▪Open your data file in Excel
▪Insert a column that should hold your marker
▪Enter a header for this column.
▪Scroll down to the line that contains the values for your reference point
▪Enter a number or an expression into your new, otherwise empty, column
Synchronize Data with Video Time Code
Before you start your synchronized data import starting from the inserted Marker, you need to know what video time code matches your marker or your data time stamp. This can be the start of your video (00:00:00:00) or any time after that.
▪Open your video(s) in INTERACT.
▪Search for the scene in the video that matches the marker in your video.
▪Remember this time code value
▪Click File - Open and select the first sensor data file to start the import wizard.
▪Set the header information and value separator as is described in the Import External Data chapter.
Data without time information
On the 6th page of the import wizard:
▪Make sure the option This file contains time information is NOT selected.
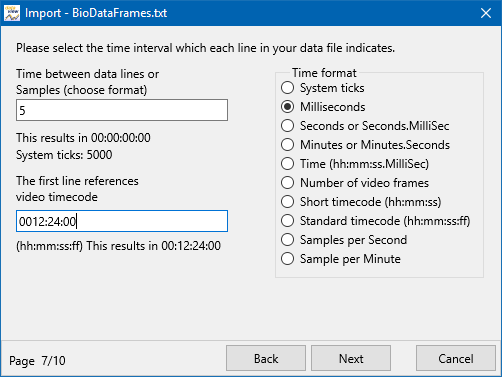
On page 7:
▪Enter the video time code value of sync frame, you wrote down, into the video timecode filed at the bottom:

Data with time information
On the 6th page of the import wizard:
▪Make sure the option This file contains time information is selected.
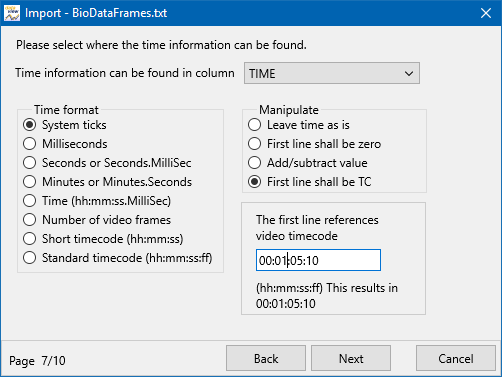
On page 7:
▪Select the correct time column, in which your time information can be found, from the drop-down menu.
▪Select the option First line shall be TC.
▪Enter the video time code value you wrote down into the Time code field:

Note: If your time information is stored in an unfamiliar format and the line distance between the values is identical, you can ignore the time information during import and perform the import at though the file does NOT contain any time information.