With the add-on Mangold HighLightMovie Creator you can create a new video file based on the selected Events or Marker entries in your main Mangold application (INTERACT, Observation Studio or VideoSyncPro),
▪Start the video editing routine from within your main Mangold application.
The selected Events are transferred to a cut-list based on which the HighLightMovie Creator edits the video(s).
Video Editing Settings
The now appearing settings dialog allows you to customize your output. You can choose from four different types of result videos and other parameters.
On the initial start, it should look like the first picture, but depending on the selected options, the dialog changes its appearance:

The main window is organized from top to bottom:
oCut List — The cut list file (.mcl ) currently loaded. When the Highlight Movie Creator is started from a host application, this is filled in automatically. Use Select … to pick a .mcl file manually.
oResulting file — Possibility to specify the target file for the rendered video(s).
Keep it to 'Not selected', to specify the name and location for every execution separately.
To predefine a default location and file name, click Select … to open a standard Save as dialog, preset with the location you used last time. Shows Not selected until chosen.
oSettings — Four output-settings tabs to specify the details for Video, Audio, Overlay and Transition. More details below.
oSettings summary — At the bottom. two rows of clickable "chips" summarize the current output configuration (output type, resolution, PiP, audio, subtitles, watermark, transition). Clicking a chip jumps to the tab where that setting is edited.
oRender — Starts the rendering process (chapter 6).
All settings are saved automatically when you close the application and restored on the next start. The output file location itself is not persisted — only the folder/name you last used is offered again as the Save dialog preset
Video Output Settings
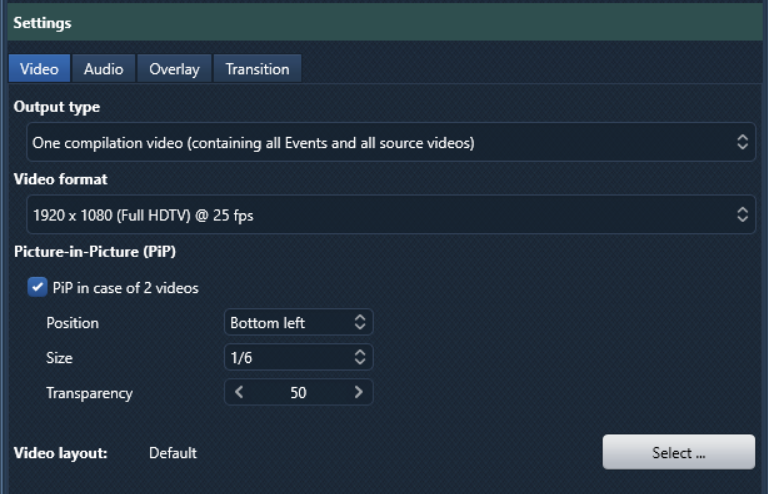
Video tab — output format, resolution and the Picture-in-Picture options (shown with a 2-video cut list)
Output type
You can choose from four different types of result videos:
Option |
Result |
One compilation video (containing all Events and all source videos) |
Results in a single video file that shows the content of all related source videos as a split-screen view or as Picture-in-picture (2 Videos only). |
Result video per Event (containing all source videos) |
For each Event, a separate video* is created. In case you have multiple source-videos, each resulting video shows all sources in a split-screen view. |
Result video per source video (containing all Events) |
Creates a compilation video that includes the sequences of all selected Events. Multiple sources are handled separately, resulting in as many videos* as were linked to your DataSet. |
Result video per source video and per Event (single snippets) |
Creates a single video* for each selected Event (slice) for each source video separately. |
*) The resulting file names are derived from the base name you choose in the Save dialog:
Output type |
File name(s) |
One compilation video |
<name>.mp4 |
Per source video |
<name> - <source>.mp4 |
Per Event |
<name>_<cut number>.mp4 |
Per source video and per Event |
<name> - <source>_<cut number>.mp4 |
Video Resolution
•Select the required resolution from the selection list:
Setting |
Resolution |
Frame rate |
Original video format |
same as (first) video source |
Same as source |
720 × 576 (PAL) |
720 × 576 |
29.97 fps |
720 × 486 (NTSC) |
720 × 486 |
25 fps |
1280 × 720 (HDTV) |
1280 × 720 |
50 fps |
1920 × 1080 (Full HDTV) |
1920 × 1080 |
25 fps |
2048 × 1080 (2k HDTV) |
2048 × 1080 |
25 fps |
3840 × 2160 (4K UHDTV) |
3840 × 2160 |
25 fps |
Picture in Picture
If a cut references exactly two source videos, you can show the second video as an inset ("picture-in picture") instead of side by side. The PiP option is only offered when the loaded cut list contains at least one cut with exactly two videos.
oPiP position - Specifies in which corner the second video is placed.
oPiP size - Specifies the size of the embedded/inset second video, in relation to the output format.
oPiP transparency - Specifies the transparency of the second video - lower value means less transparency, thus a more solid picture.
IMPORTANT: PiP Only works in combination with Video Layout 'Default'.
Video Layout
Depending on the number of videos, it is possible to choose between different output layouts.
▪Click Select... to change the default layout.
In the upcoming window, a preview of the available videos:
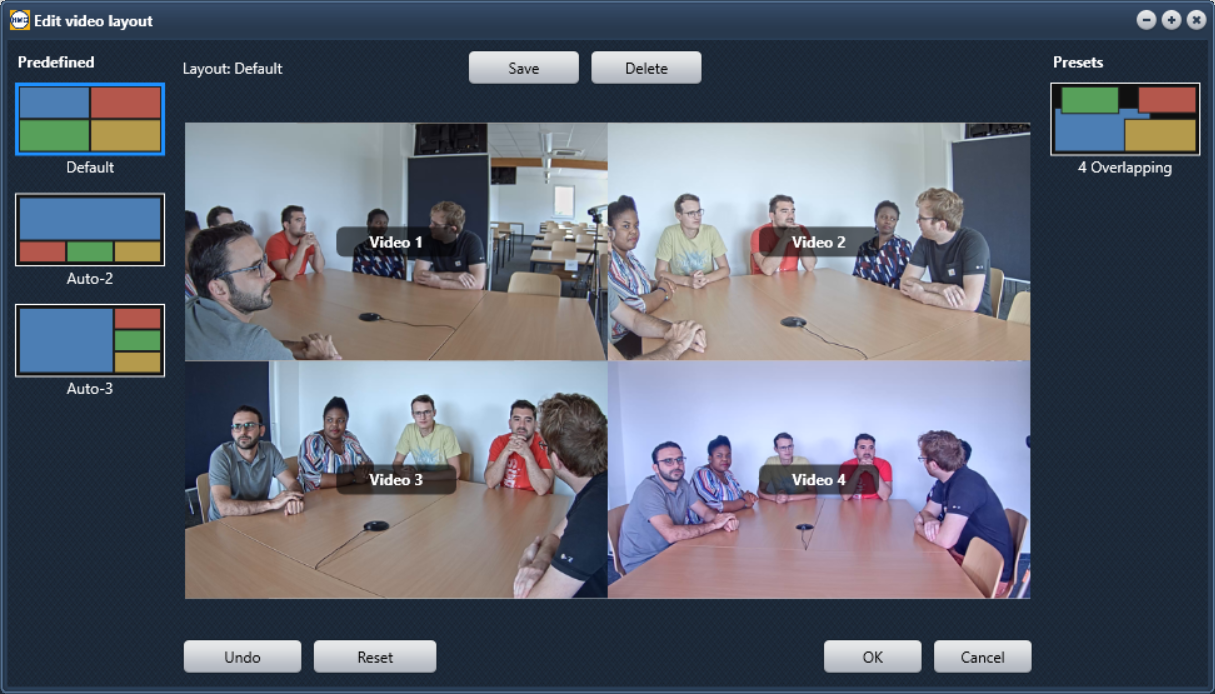
On the left side of the Edit video layout window, depending on the number of videos selected, one or more predefined layouts are listed.
▪Click on an alternative layout to adjust the preview and output of the resulting video.
Custom Video Layouts
It is possible to freely rearrange the video previews to your liking:
▪Click on an image to activate it (4 blue squares appear)
▪Drag the image as a whole to its new position
▪Resize the preview by dragging the blue squares in any direction.
▪When all videos are arranged to your liking, click Save to save the current layout under Presets.
▪Enter a name for your custom layout and confirm with OK.
The new, custom layout appears under Presets at the right side of the Edit video layout window.
The layout selected last will be used during the next rendering command.
Output Settings Audio
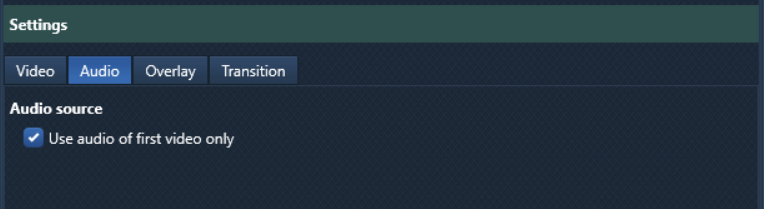
Use audio of first video only - Per default, when a cut combines several source videos, only the audio track of the first video is used. This prevents a cacophony caused by multiple simultaneous audio tracks.
Note: A host application can also provide a separate audio file as the audio source (for example an external audio recording from VideoSyncPro Studio). If the cut list references such a file, it is used automatically as the audio of the resulting video.
Output Settings Overlay
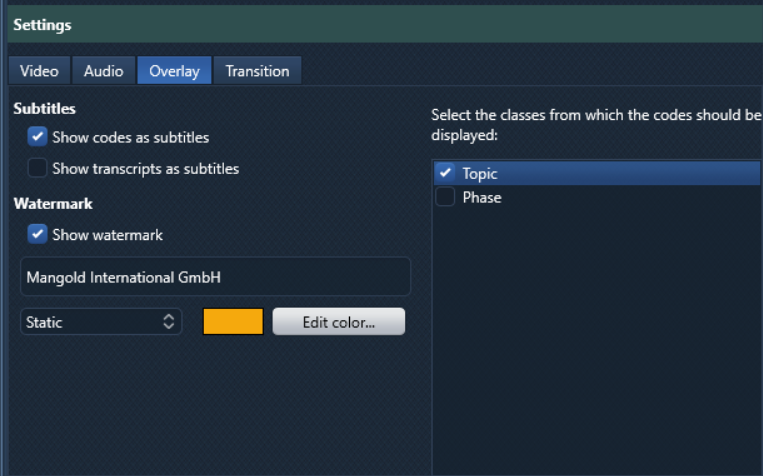
Subtitles
Insert subtitles in your result video, using the following options:
Show Codes as subtitles - Inserts the Codes logged within the selected Events, as a subtitle to the corresponding clip. When you activate this option, all available Classes appear in the Select the classes from which the codes
should be displayed list:
Select the Classes from which you wan to display Codes as subtitles: - This field lists the Classes available in the current data file.
•Select the Class or Classes of which the corresponding Code shall appear as a subtitle per clip.
Show transcripts as subtitles - Inserts comments, available within the transcription field of the selected Events, as a subtitle to the corresponding clip.
Watermark
Activate Show watermark to burn a text into the video image:

You can enter a text in the text box and decide how this text is displayed:
oStatic - The text is displayed at the upper left corner of the resulting video.
oMoving - The text slowly moves diagonally across the video image.
oRandom - The text randomly appears on different spots on the video image approx. every 5 seconds.
oEdit Color... — Change the font color of the watermark text.
Output Settings Transition
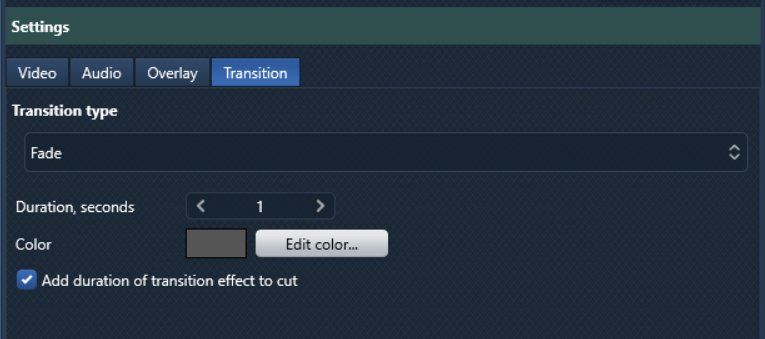
For multiple Events within the same result video, you can specify the type of transition between the clips (slices):
oNone - The clips are joined seamlessly.
oHard cut - A colored gap of the specified duration is inserted between the clips.
oFade - Each Event-based clip is faded in and out to the transition colo. You can define the length of the transition.
Note: Transitions are not available if you select the output option that creates single snippets per Event.
Additional transition settings:
Transition Duration
How long it takes to fade in and fade-out, or how long the gap between to clips is, is specified in seconds:
•Select the number of seconds for your transition time.
Transition Color
The transition color is shown in the colored box underneath the Transition Duration. You can specify the background color of the transitions:
•Click Edit colors... and pick the color you prefer from the standard Windows color picker dialog.
Timing
Per default, the transition time is added to the selected Events, so no visual information is lost due to the transitions.
•If you want the transition to be part of the sequence that is covered by the selected Event, clear the Option Add duration of transition effect to cut.
Watermark
At the bottom of the dialog you can activate the Show Watermark option:
You can enter a text in the text box and decide how this text is displayed:
oStatic - The text is displayed at the upper left corner of the resulting video.
oMoving - The text slowly moves diagonally across the video image.
oRandom - The text randomly appears on different spots on the video image approx. every 5 seconds.
Rendering
Rendering is the process where all your edits, effects, transitions, and audio, and processes are applied to create a playable video file or files. This process requires sufficient GPU-power.
▪Click Render to start the video editing routine.
▪Select the target folder and enter a base name for the new video(s), then confirm. The dialog is preset with the last location you used
After confirming the settings, a standard 'Save as' dialog appears.
•Select the target folder and enter an appropriate name for the new video.
•Click Save to start the editing process.
The editing routine starts, using the time information from the Events.
A dialog with a progress bar appears, informing you about the rendering process of the video:

Note: How long exactly depends on the number and length of the elected clips, the available rersources on your computer (GPU/RAM) AND the chosen options: Fading transitions take longer than hard cut transitions, no transition is again faster than that. Also, the Picture in Picture option takes longer than videos side by side.
Last but not least, the output resolution also plays a significant role.
The moment the rendering finishes, a dialog reports Rendering process finished successfully:
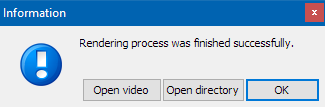
•Click OK to close the dialog.
•Click Open directory to open the folder in which you stored you highlight video(s).
•Click Open video to play the resulting video in your default media player.
Note: In Mangold INTERACT, if you have linked multiple videos to one DataSet, all videos are edited.
If you want to edit just one of the videos, you need to temporarily disable the links for the unwanted videos by changing the keyword "Video:" pointing to the unwanted videos; e.g., into "Xideo".
Mangold VideoSyncPro offers a list with available sources to choose from.